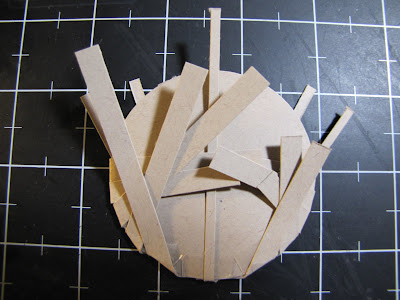
Materials needed: Crumb Cake or brown card stock, circle punch, Sticky Strip or other adhesive, paper trimmer, scissors
1. Punch out a circle the size you desire for your basket. The basket will end up the size of about half the circle. My circle is 2 1/2" in diameter.
2. Cut 3 strips of card stock approximately 1/8" in width. The length of your strips should be about twice the diameter of your circle.
3. Cut about 5 strips of card stock approximately 1/4" in width. The length of these strips should be at least an inch longer than the diameter of your circle.

4. Add a piece of Sticky Strip or adhesive to the bottom of the front of your circle.

5. Adhere one 1/8" strip vertically on your circle. Fold your other two strips in half, and adhere them in an alternating V shape, with the bottom half adhered to the outer edges. Your strips from left to right should be #2 bottom half, #3 top half, #1, #2 top half, #3 bottom half.

6. Weave a 1/4" strip in an over-under fashion. Weave your second strip in an under-over fashion.


7. Continue weaving the rest of your 1/4" strips, alternating your weave pattern. Your strips should cover about half of your circle base.

8. Flip your basket over and add adhesive around the edge of the back of your circle.

9. Fold the excess of your woven strips back, starting from top to bottom, including the center vertical strip. It's okay if the back looks messy.

10. Trim the excess.
11. Flip your basket back over. Tuck your thin strips down, into your basket. There is no need to trim these, as they will help provide the dimension to your basket.
12. Cut the top of your basket base off. Use this piece to adhere your flowers. Trim excess, then adhere with dimensionals.
13. To create a handle, cut 3 long 1/8" strips and braid. Trim to size, then adhere the ends with glue dots to the inside of your basket.
Voila!


Beautiful just beautiful! Thanks for the directions. Now I'm off to make one. I am so excited as this will be incorporated in my Easter cards to my children and grandchildren. Love your work.
ReplyDelete